Unicycle LED Lightshow – ESP8266 controlled over WLAN
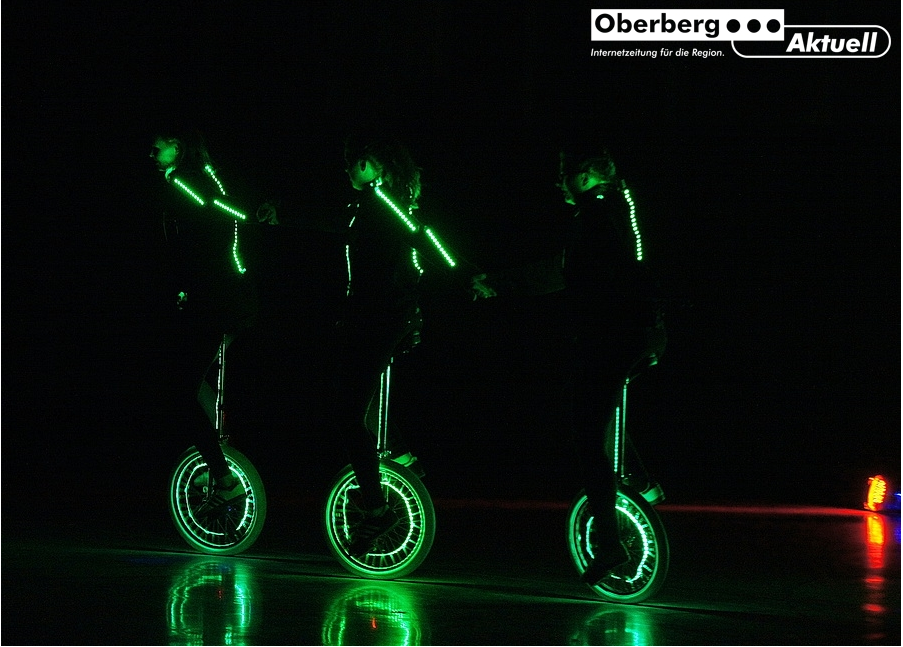
My kids are passioned for riding unicycle. Once the idea was born to add lights for a show event. Adding some lights would be already cool but inspired by other lightshows, the lights should be synchronized with the music.
It was quite an adeventure but a great learning experience dealing with new items like LiPo, DMX, EL-wire, LED stripes, RF modules etc.
The very first thought was to program everything into the control unit of one stripe.
I have disregarded this because of two reasons:
1) With three actors (later will be 5), you are having 3×3=9 control units. For any update, you have update all boards. During the show, you need to find a way to sync the modules.
2) My main argument for using one sender is not a technical one:The kids should be able to create and update the show without me. Just imagine how many tweaks are done until the choreography is finished
The current architecture has bascially three elements:
– Windows Notebook with Vixen 3
– Sender : standard wireless router
– Receiver : ESP8266 + MOSFET driver + LED Stripes + LiPo 2S
The first attempt was based on arduino Nano and NRF24. After some events, I had to overcome some limitations and moved to ESP8266 as this providing much more flexibility.
Step 1: Receiver Module
The modules are based on NodeLua Boards. I started to design my own PCB’s but these modules are so cheap and do come with integrated voltage regulator, which you need when using the same battery for the LED stripe as well.
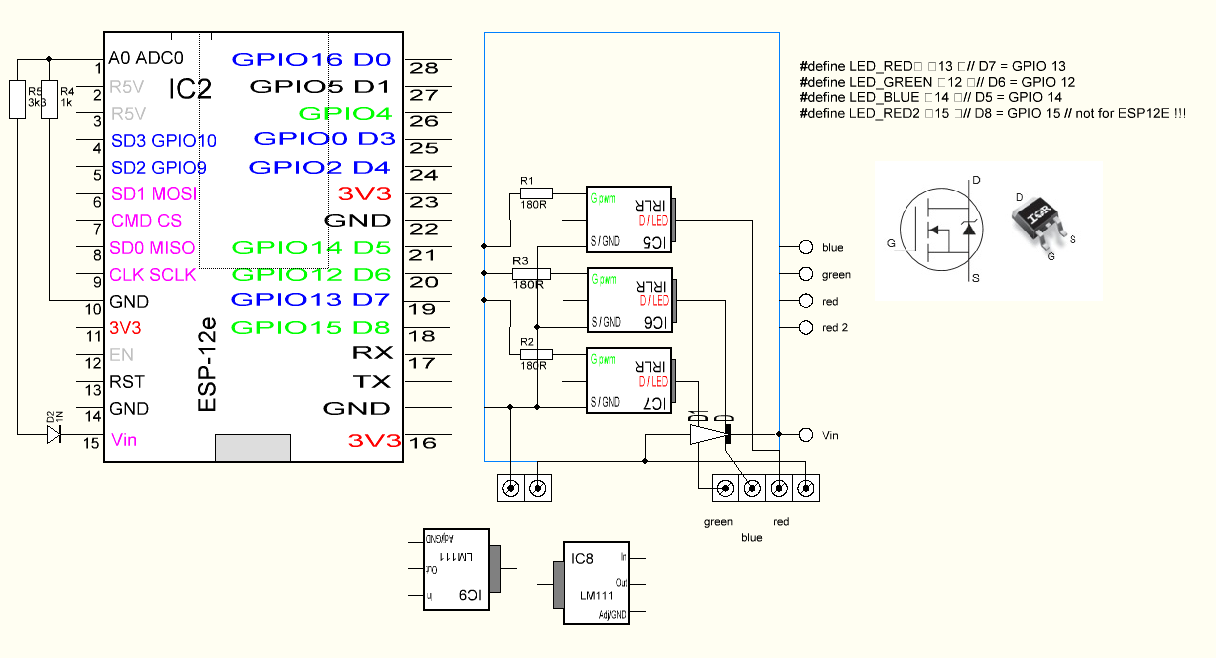
To get the hardware completed, you just need to add the driver consisting of two resistors and one MOSFET per colour. For monitoring the battery power, another two resistors are used. A standard PCB is mounted as piggy back – so it is pretty fast to get this assemled. Much simpler than dealing with an arduino and an NRF24.
Although the design is pretty simple, the key is to select the right MOSFET having a low R DS (on) and V GS(th) below 3V. There are two types: IRL and IRF. IRL is a Logic level FET designed to switch at a voltage below 5V. On eBay I found the IRLR7843 in a D-PAK housing for surface mount. So it is small but not too small for soldering by hand.
The circuit diagram needs to be updated as the pull-down resistor for the MOSFET-Gate is missing. The module works without, but when you power up the module, the LED stripe will flash.
If you want to see a much more professional design go here: Pixel Controller
The software was quite simple at the very beginning: reading a DMX package and retrieving the relevant information for the specific LED stripe. This required some switches and jumpers to configure a module.
When using the ESP8266 a web server with an admin interface was implemented to configure the module.
The software has been updated after every show in order to get more flexible, increase liability and allow monitoring. Every module is sending perdiodically data to a node server, so I am able to check if the whole equipment is ready like WiFi signal strength, battery voltage and module state. In addition the node server is able to reset a certain module or request a firmware update.
The code for the ESP module is available at github: https://github.com/ThomasH-W/ESP8266-Artnet-Node
Step 2: Mounting LED Stripes
For the body of the actor we are using a coat with a zipper so you can easily dress up before the show.
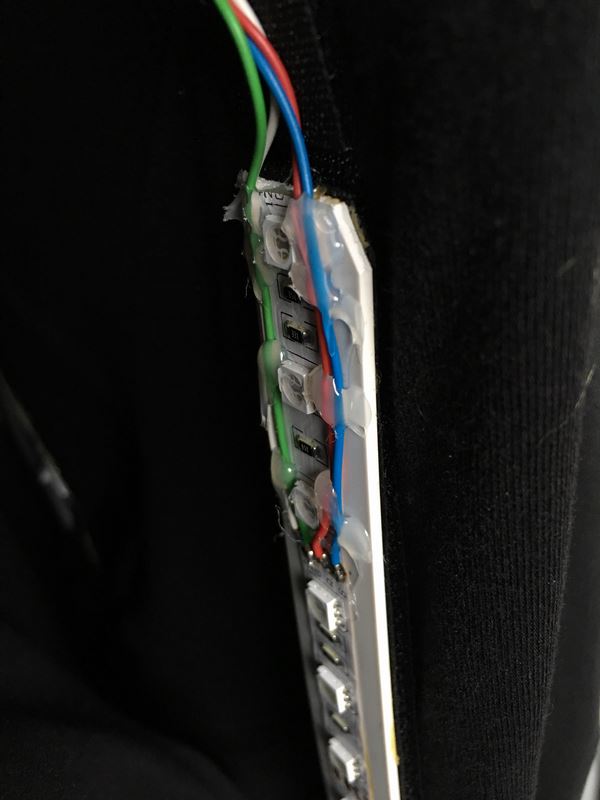
Instead of directly attaching the LED stripes, we used velcro straps which are stitched to the coat. The counterpart is glued to the LED stripe.
At the beginning I have used connectors to attach the cable to the stripes. This was really unreliable. and basically every connection broke due to the various movements of the actors. So I removed all connectors and soldered the cables. Using the solder points at the very end of a stripe is exposing the connection to mechanical movements. Due to this I am not soldering the cables at the end of the stripe and fixing the cable with hot glue. I need to admit that this does not look professional but the audiance won’t see this in the dark anyway.
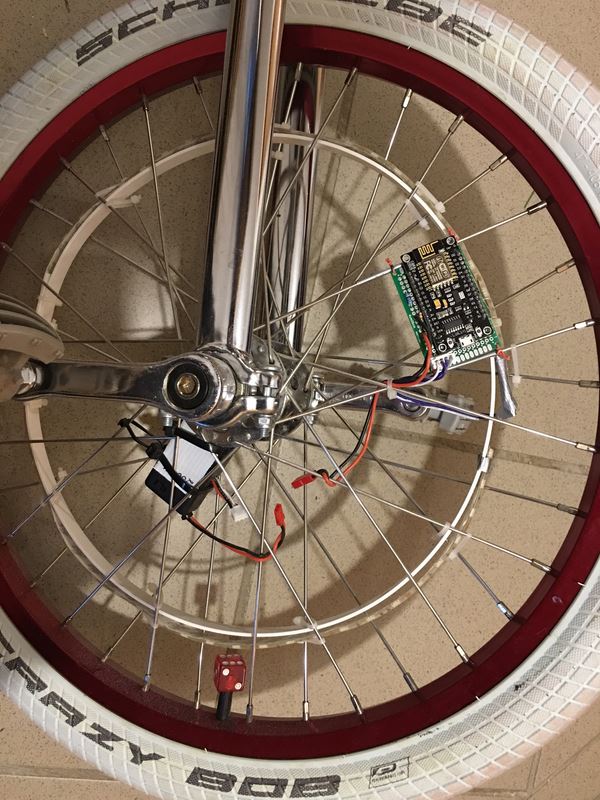
On the wheel, the module and the batterry are simply fixed to the spokes. Next to the LED stripe is a plastic stripe to support a nice round circle.
Step 3: Power Supply
LED stripes are designed to operate at 12V. Batteries at this voltage are to big to mounted on the wheel or the saddle. An alternative was a 9V block battery (PP3 / 6LR61). The voltage is still ok but the main drawback is the time needed to exchange all the batteries before a show, as I do want fresh batteries for an event.
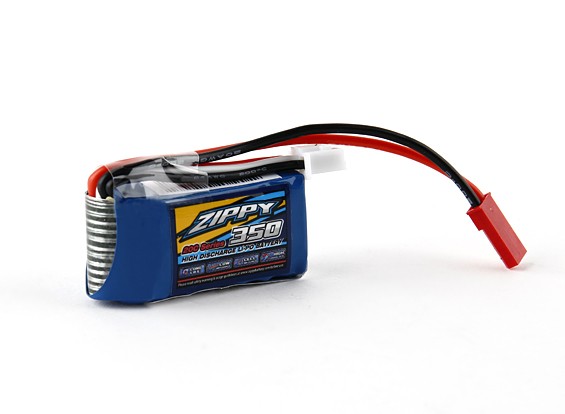
Finally I moved to LiPo:
The LED stripes can operate at 8V. Depending on the color, even 7.8V could work.
Accordingly you need a LiPo battery with 2cells – 2S. Fully charged the voltage is 2 x 4.2 V = 8.4V
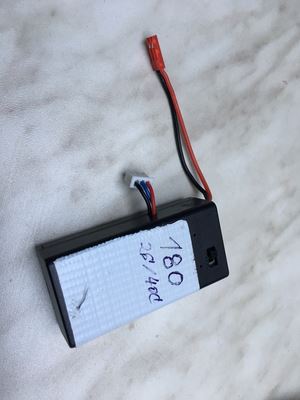
For my application a capacity of 350mAh is enough and the size of the battery is small enough to fit into a standard housing for a 9V battery including a switch.
I have chosen batteries with a JST-XH connector as a balance plug and Mini JST for the discharge plug. All the standard chargers can handle these connectors.
I used a standard housing for 9V batteries with a switch to mount the battery at the unicycle. Two batteries of the same type can be charged at the same time using an adapater connecting two 2S cells to a 4S port at the charger.
Step 4: Creating the Show
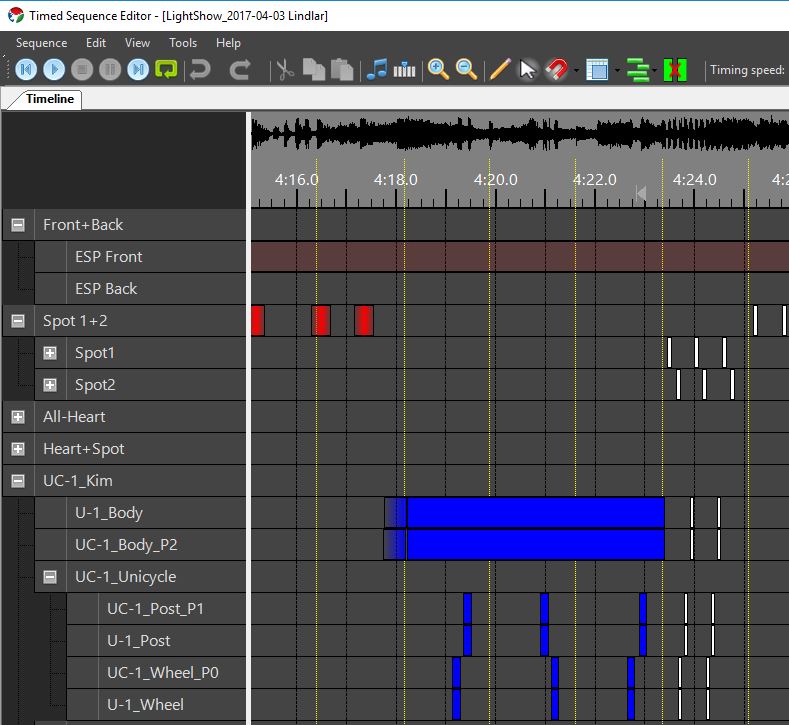
There is an awesome program providing an real simple but powerful user interface: Vixen Lights. Everything is done via drag and drop and the music is shown in the timeline. I have looked at some professional programs before, but this one is for free and provides everything I need.
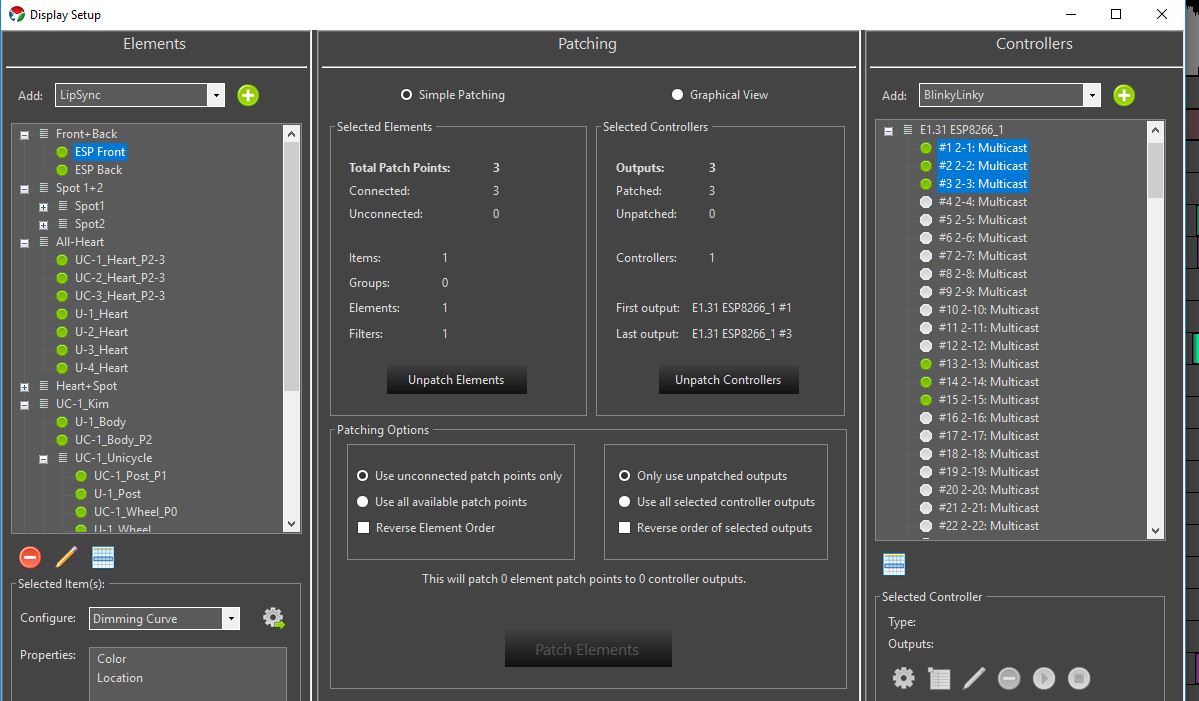
The very first thing is define the display and selecting the controller:
Next you define the different LED stripes and create groups , so it is much simpler to control a specific set of light, e.g.: all lights attached to one driver. or all wheels.
In general you select the music and import the clip into Vixen incl. the beat markers.
Effects are asigned to an display element and be altered in many ways.
A great help is the simulation tool where you can see how the scene will look like in real time.
In a nutshull, the program will send the DMX data to the output controller which is in my setup a multicast DMX server running on the Notebook. The module are connected via WiFi / WLAN. Every LED is determined by the DMX universe as well as the offset within the DM512 data package.
You can find Vixen here: http://www.vixenlights.com/
Step 5: The Show
The choreography has been tweaked a lot of times. In addition to the actors, DMX-spots have been added as well straight LED stripes as safety lights whenever the stage is elevated. All them are using the same ESP module and are controlled by Vixen.
Going forward I may utilize APA102 LED stripes to allow more sophisticated effects.
This may require to use multiple universes leading to a signifcant step function in updating the software as well as the Vixen setup. Not sure if I want to do this but it is appealing.
Update Feb, 21019:
In the meantime I found a device which is based on an ESP8285. It is incredible small and has the MOSFET already on board. Accordingly I just need to flash my firmware and solder the wire.
On ebay you will find the device for approximately $7
ARILUX AL-LC01 Mini WIFI LED Controller










Pingback: ESP8266 DMX Modul mit Web-Server - Thomas Höser
Hallo,
ich habe eine Frage zur Software Vixen Lights.
Denn wie es aussieht benutzt du hier artnet um die ESPs anzusteuern, allerdings sehe ich keine Möglichkeit, dass Vixen Lights artnet als output unterstützt.
Daher frage ich mich, wie du die DMX Signale an die ESPs gesendet hast. Insgesamt ist mir die ganze Sache der Übertragung vom PC zum ESP ziemlich unklar.
Zur Info:
Ich bin ein Jongleur und habe meine in meine RGB LED Keulen einen ESP12F eingebaut. Die insgesamt 7 Keulen möchte ich jetzt passend zur Musik steuern, um einen spektakulären Auftritt zu kreieren.
Ich würde mich sehr über eine Rückmeldung und Erklärung freuen
MfG
In der allerersten Dokumentation habe ich dummerweise den Begriff ArtNet verwendet. Stimmt aber leider nicht.
Es wird ein ACN bzw. E1.31 Protokoll verwendet, welchen die DMX512 Daten verpackt und über das WLAN schickt.
Hierbei gibt es zwei Möglichkeit: Unicast und multicast.
Details on E1.31
Beim Unicast muss der Sender die IP-Adresse des Empfängers kennen.
Daher verwende ich Multicast. Dabei schickt Vixen die Daten an eine feste IP-Adresse und alle Empfänger lesen alles , was dort hingeschickt wird.
Hört sich kompliziert an, man merkt aber davon gar nichts. Wichtig ist nur, das Sender und Empfänger das gleiche universe benutzen.
Viele Grüße,
Thomas
Hey, total cool, dass Du deine Firmware einfach so teilst!
Ich bin nach einiger Recherche und Plänen, die Arilux/Magic Home Adapter zu flashen auf deine Seite gestoßen und habe noch eine Frage zur Kompatibilität: Läuft die Firmware auf dem ESP8285 genauso wie auf dem 8266?
Und noch eine Frage: Es gibt die fertigen Adapter auch für Pixelstripes a lá WS2812B – deine Firmware sollte sich leicht anpassen lassen, richtig?
Hi Jami,
die Firmware läuft ohne Änderung auf beiden Versionen.
Grundsätzlich lässt isch das natürlich einbauen. Leicht ist aber relativ.
Gruß,
Thomas